The department of Scientific Computing supports a one-of-a-kind classroom facility on the campus of FSU to support 3D immersive visualization and game design. The classroom was funded in part by a Student Technology fee award for instructional technology enhancements and with generous support from Dell, Inc. Faced with increasingly large and complex data sets, from organismal genomes to astrophysical phenomena, students and researchers are turning to new ways to summarize, explore, understand, and present these data. The presence of local facilities for scientific 3D visualization promotes the potential for future discoveries, increases the public's understanding of complex phenomena, and helps to prepare our students to compete in a difficult job market.
Workstations

 The classroom is equipped with 19 workstations designed to support stereographic 3D content. The workstations are configured as follows:
- Dell Precision T5500n
- Dual quad core Intel Xeon E5606, 2.13 GHz, 8M L3, 4.8GT/s
- 6GB DDR3 ECC SDRAM, 320GB HD per OS
- Dual 2GB nVidia Quadro 4000 with 2DP and 1DVI
- Monitor: LG D2342P - 23" Widescreen Passive Cinema 3D LED LCD
- Default OS: Redhat Enterprise Linux Workstation 6.1
- Secondary OS: Windows 7 Professional x64
On reboot, users can choose which OS to start from the Grub/Boot menu (right after the PXE boot prompt) by pressing the up/down arrow keys. Remote access is only available during non-business hours (via qlogin). 3D demos are available in both operating systems as follows.
3D Stereo Graphic Demos
Windows Demos
- Boot to Windows 7
Typically Linux is running and need to restart the system. After BIOS, press ESC key a couple of time to get to the boot menu, select "Windows 7..."
- Login using SC/FSUID and password
If the user has never used Windows authentication before, he/she will have to see TSG staff to create samba hashes.
- You will need 3D glasses to properly view the demos
- Upon successful authentication, users can simply double click "TriDef 3D" on the Desktop or from Start menu... Now users can choose the following:
- Watch 3D Videos
- View 3D Photos
- Other 3D demos are also possible, for example, via Stereoscopic Player and supported 3D formats...
- Upon successful authentication, users can simply double click "TriDef 3D" on the Desktop or from Start menu... Now users can choose the following:
- If for some reason, demo files are lost, users can also get demo videos from
\\fs.sc.fsu.edu\public
- Please email
This email address is being protected from spambots. You need JavaScript enabled to view it. for any related issues.
Redhat Demos
/panfs/panasas1/system/software/public/linux/3D_demo
You may also go to /panfs/panasas1/system/software/public/linux and run each demo separately.
./multi
Usage: ./cvt [option [value(s)]]
Choose domain geometry
 -B   Axis-Aligned Box
 -S   Sphere

Choose stereo type
 -s 1 CrystalEyes
 -s 2 Red-Blue
 -s 3 Interlaced
 -s 4 Left
 -s 5 Right
 -s 6 Dresden
 -s 7 Anaglyph
 -s 8 Checkerboard
Usage: ./sfc [option [value(s)]]
Choose space-filling curve and approximation order
 -r O Raster curve
 -z O Lebesgue curve
 -g O Gray curve
 -h O Hilbert curve

Choose stereo type
 -s 1 CrystalEyes
 -s 2 Red-Blue
 -s 3 Interlaced
 -s 4 Left
 -s 5 Right
 -s 6 Dresden
 -s 7 Anaglyph
 -s 8 Checkerboard
Display Options
The classroom supports two large format displays, both of which are suitable for presenting information to persons seated at the classroom workstations. Both displays are capable of projecting content from the instructors workstation, a personal laptop (only via the projector), a document camera, and video conferencing cameras. The sections below describe how to connect and display from each input devise.
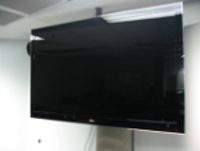
LED Display
- LG 65LW6500 - 65" 3D 1080P TruMotion 120Hz LED Smart TV
- Owner's Manual, Magic Motion Remote Control Guide - pp36-37
Connecting:
- Turn on the LED display by selecting the power button on the LG Magic Motion Remote
- Next, select HDMI1 using the LG Magic Motion Remote
- Press the round blue Enter button on the remote to operate
- Instructor workstation - default
(Press Ctrl + Alt + Backspace if HDMI1 only shows the extended screen from the workstation) - Laptop - not supported
- Elmo - see the Elmo section below
Projector
 The classroom supports a ceiling mounted projector as a secondary display device. We recommend using the large format HDTV if possible. Supported devices are: the instructor workstation, personal laptops, and the document camera.
Remember to turn the projector off by pressing the OFF button twice via the wall control panel. Please give the projector a couple of minutes for cooling if you need to turn it on again.
- Instructor workstation - You need to boot to Windows 7 and power on the projector and select COMP (INPUT 1) input via wall control panel.
- Laptop - If you are using a laptop via VGA switch box Laptop (input B or input D, whichever cable is used to connect to your laptop), power on the projector and select COMP (INPUT 2) input via wall control panel.
- Elmo - See Elmo section below
Elmo - Document Camera
 Visual Presenter HV-7000SX
- Change VGA switch box to Overhead/ELMO (input A)
- Power on LG HDTV and select AV1 input using LG Magic Motion Remote
Video Conferencing
 The classroom is equipped with video conferencing equipment and software to facilitate involvement in activities hosted remotely or to share with a broader audience, events hosted by the Department. Our principle video conferencing platform is called EVO. EVO is a video conferencing tool based on a distributed architecture that allows users from academia to simply and freely collaborate with each other. For more information about EVO, please visit the EVO website here. More information on how to use the EVO system from within the Department of Scientific Computing can be found here.
| File | Description | File size |
|---|---|---|
| LG 3D HDTV Remote Manual | 155 kB |